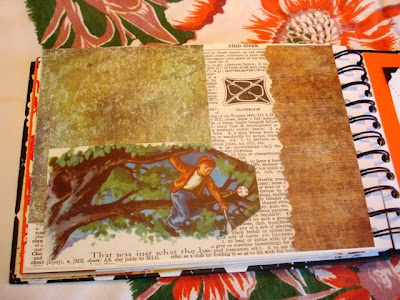
FANTASTIC!!! Love the book and all the fun autumn colors. I think my favorite page is the little boy peeking from under the table leg.
I got your sweet little thank you gift and love it! I will post on it and leave a link back to you. I adore the layered paper flower embellishment. I have put it on my inspiration board where I can admire it. Have a super sweet week and thank you for the congrats on our new family member.
You did a fantastic job on this book. I love it. It would be the perfect book to capture this Halloween. I am off to check out your Etsy store! Thanks for visiting my blog. I really enjoy hearing from you! Tammy
What a lovely book - very pretty in all its autumness! I am afraid that I am a very messy journal keeper, I am sure to spoil this little beauty if I were to keep a journal in it. By the way, who did you pick to choose weekword this week?
I love this book ! ...the seasonal colors, ephemera, everything!
And I especially love my special little gift!!!....and cute card and warm, wonderful note. My friend Sevan was helping me get ready for the show when I received it. My eyes filled with tears, and my heart filled with love. Thank you my artist sister friend.You are so dear.:)
Laurie, This is a fabulous journal! Did you do the spiral binding too? I've always wanted to learn that method though I think it takes certain tools to accomplish this. Your artwork is such an inspiration to me! Love the autumn colors and all of your creative uses of ephemera! LOVE IT!!!
Here's a tutorial to make sweet baby Jesus ornaments: Materials: 3/4" round wooden balls blue felt like-sized small wooden stars flesh-colored acrylic paint yellow acrylic paint black permanent marker small button as star decor raffia natural excelsior "moss" silver thread or coordinating yarn candy cane You'll also need glue or a hot glue gun, paint brush and scissors Begin by painting the wooden balls with flesh-colored paint and the stars with yellow paint. When dry, draw two sleeping eyes on the ball. Meanwhile, cut small pieces of felt and make little rolls to represent the baby's body; tie with a tiny piece of raffia. Next, glue the wooden ball onto the top of the body roll of felt; if you wish, you can also cut a small wedge of felt to glue over like a little swaddled hood on the baby's head, but I think it looks cute without it as well. G
Earlier in the season Rebecca and I went to a craft fair at a local high school, and there was one booth with the CUTEST little jeweled, framed Christmas trees! The gal was nice enough to let me photograph them. Sorry it's kind of blurry, but it was dark in that high school gym! I know it's an older kind of craft (from the '60s and '70s) but she made them sweet -- not gaudy at all. We were both SO inspired. So, last week we made it happen. I brought a bunch of my old, broken vintage jewelry, some velvet, glue, old frames, and we sat in her dining room and made a forest of little trees! It was so simple: first, we took a vintage frame and covered the backing with velvet. We just glued it on. Then, we took our time arranging bits and pieces of jewels into a Christmas tree shape. When we were happy with the arrangement, we committed and glued the jewels down! I love this avocado green velvet! And then we did it again. We had so much fun playing
I indulged in some thrift shopping this morning, and was very happy with what I came home with for just under $5: This pretty runner, which I intend to take apart for its tatted middle I don't know why I felt I needed this veil -- but I did. It's new in the package. Just in time for Oktoberfest -- these tiny paper party hats! They originally had feathers attached, which I might replace since these came without. This extra large pad of hangman pages -- I thought it would be the perfect thing for hanging out with my son next week. We used to love to play that when he was little! Even though these transfers are intended for punch needle, I think I can just as easily use them for regular embroidery. Some handwritten letters, a prayer card, and an old postcard. Did you notice this under my pile of ephemera? I had to have it! It desperately needs cleaning... but it's PINK and I think it will be fun to craft with. This party centerpiece is incomplete, but I still like it -- e
Comments
I got your sweet little thank you gift and love it! I will post on it and leave a link back to you. I adore the layered paper flower embellishment. I have put it on my inspiration board where I can admire it. Have a super sweet week and thank you for the congrats on our new family member.
You did a fantastic job on this book. I love it. It would be the perfect book to capture this Halloween. I am off to check out your Etsy store! Thanks for visiting my blog. I really enjoy hearing from you!
Tammy
By the Way- who is the next word of the week person??
I love this book ! ...the seasonal colors, ephemera, everything!
And I especially love my special little gift!!!....and cute card and warm, wonderful note. My friend Sevan was helping me get ready for the show when I received it. My eyes filled with tears, and my heart filled with love. Thank you my artist sister friend.You are so dear.:)
xo Lydia
Blessings,
Christine
Mike
www.mikeleonen.com
Twitter: AboutParenting
Have you chosen this weeks weekword author?
x Sandra x
Your sweet gift tag is at the top of my post today! Love it!
(Did I tell you I love it?)